Showing posts with label gluten-free. Show all posts

10.16.2011

finally

Finally, finally, finally, I've got this just right.

These are so wickedly absurdly good, I can't believe that I haven't discovered them earlier. "Oh?" You say. Yes, that's right, I do. These little veggie-curry-cakes are not only tasty, but full of cauliflower!

It has taken me a few disastrous attempts to recreate a friends' recipe, and trust me, the failed tries were so very bad, that I was skeptical that I should even try again. I had to though. Just trust me when I say that chickpea flour can be very, very bitter.

First off, it is easy to get tired of just eating plain old cauliflower and broccoli, and most improvements on taste, definitely forgo any reasons to eat these tree-like friends for health. Secondly, my kid will eat nearly anything. Okay, so the liver and onion pâté I made for dinner, he didn't really like. However, he does love to eat sautéed onions by the boatload, and will eat gobs of blackberries more tart than most lemons. But cauliflower? Broccoli? Forget it. Hide it? Ha! Disguise it? He'll still recognize it. But in these patties? It even stumped him! Although, he does love curries and spices in general.

I guess you could say that these are mostly potato cakes with a good swack of other veggies, and then some curry powder and cumin to liven things up.
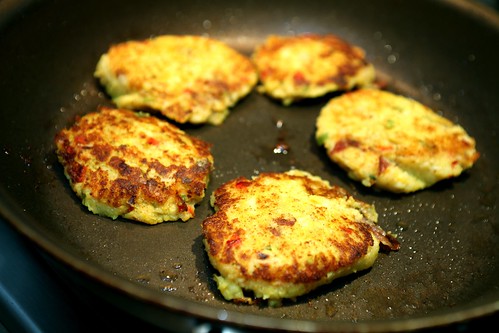
IMG_7346

The recipe makes 16 patties, but it is exceedingly difficult to not eat at least a few...
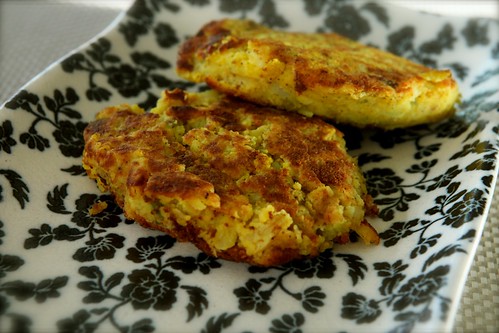
IMG_7354

Cauliflower-Potato Cakes

Makes 16 patties

1/2 head cauliflower (3 cups), cut into large pieces
4 medium red potatoes, halved
4 medium new potatoes (white), halved
1/4 cup very finely diced red pepper
1/4 cup chopped green onion
1 tbsp chickpea flower (or other flour you prefer)
1 tbsp + 1 tsp salt
2 tsp curry powder
1/2 tsp ground cumin
extra virgin olive oil, or coconut oil for frying

1. In a large stock pot, cover all the vegetables, with water and bring to a boil with 1 tablespoon salt. Cook until the potatoes and cauliflower is fork tender. Drain, and let cool slightly.
2. In a large bowl, place the spices, chickpea flour, and 1 teaspoon of salt.
3. Add the vegetables to the bowl, and mash with a potato masher, and stir to combine everything together into a dough.
4. Using a griddle or nonstick skillet, heat 1 tablespoon of oil. Make patties by filling and ice cream scoop with the dough, release it onto the pan, and then flatten it into a pattie with a spatula. Cook on each side for 3-5 minutes, until golden brown. Consume immediately, or freeze for later. Enjoy! Follow my blog with Bloglovin

4.22.2011

I love carrots

Carrots?  Yes carrots.

Not always, but recently, I've become carrots biggest fan.  Cheap, cheerful, and organic.  Carrots just take a little creativity to get away from everyday steamed or roasted carrots.

My solution?  Grate them!

It is extra easy and quick with a food processor, and it takes just the wink of an eye for the carrots to cook.  The best part is how they make this beautiful orange oil, and it's beyond delicious too.

Grated carrots are an easy way to eat fewer noodles, less meat, and more vegetables.
i love carrots

I tend to like my grated carrot creations with XO sauce. Thanks J&C! Sriracha is hip too.
xo

A little meat, a little extra cilantro, cucumber, and green onions never hurt much either. I had these Vietnamese-esque beef and pork kebab type bits in the freezer. It made for quite the perfect pairing!
IMG_5303

Vietnamese-esque Lemongrass Kebabs

2 pounds ground beef
2 pound ground pork
2 eggs
1/2 cup water
4 cloves crushed garlic
1/2 cup finely chopped onion
10 leaves fresh mint, finely chopped
2 tbsp finely chopped lemongrass (tender parts)
2 tbsp finely chopped cilantro
salt and pepper

1. Pre-heat the oven to 400 degrees Fahrenheit.
2. Line a large cookie sheet with parchment paper.
3. Lightly beat the eggs. Combine all the ingredients.
4. Shape the meat into patties, or kebab shapes.
5. Bake until the internal temperature of the meat is 170 degrees F, or approximately 20-25 minutes. Enjoy!

Carrot Noodles

1 tbsp extra virgin olive oil
5 carrots (preferably organic)
1 red pepper
1 tbsp freshly ground ginger
1/3 cup miso paste
2 tbsp finely chopped cilantro
16 oz, 454g, wide rice noodles
(optional serving accompaniments - green onion, thinly sliced cucumber, chopped cilantro, XO sauce or sriracha)

1. Boil a large pot of water, and cook the noodles according to package directions. Drain.
2. Clean the ends off the carrots, and section the red pepper. Using a food processor with grating attachment, grate the carrot and red pepper.
3. Heat the olive oil in a skillet. Add the carrots and bell pepper. Let sizzle for a couple minutes, until a nice orange oil appears. Stir in the ginger.
4. Whisk the miso with a 1/2 cup of water, and add to the carrot mixture.
5. Turn off the heat. Add the cilantro and the noodles. Enjoy!

4.05.2011

dinner in 16 minutes?

I dare you.

Mango. I love, love, love mangoes. And shrimp? Match made in heaven. Don't even get me started about it on a pizza. With brie. I know, I know, you're thinking I've seriously lost my mind. But it works. Mango is just so darn buttery, and sweet. Certainly, brie is too. Shrimp could usually use a little bit of fattening up anyways. Wait a second, I'm supposed to be talking about a salad.

Here it is -
unbeautiful, but 16 minute dinner

See, it's not that pretty, but the 16 minutes included taking a couple photos.

I really did make dinner in 16 whole entire minutes, and it's healthy too. Baby even got his mango cut just for him, a little beef and saucy green beans warmed up too (babies don't eat lettuce or shrimp).

It also helps to have a few bags of frozen raw peeled shrimp on hand to rush the process along. Just try to defrost it in advance; the one thing I often forget.

Mango Shrimp Salad with Mango Dressing - In a Hurry!

Serves 2

For the salad:
454 gram bag of raw-peeled shrimp
extra virgin olive oil
1 large ripe mango
1 carrot
1/4 red pepper
salad greens


For the dressing:
1/4 cup mango
1/4 cup olive oil
1/3 cup blackberry vinegar (balsamic would be fine)
thumb nail-size chunk of fresh ginger
squirt of honey

1. Pre-heat a sauté pan with a couple tablespoons of extra virgin olive oil. Cook the shrimp until pink. Let cool as much as possible before adding to the salads.
2. Wash the carrot, mango, red pepper.
3. Place salad greens in the bowls. Grate the carrot, and chop the red pepper. Add to the bowls.
4. Remove the flesh from the mango. Place 1/4 cup in a small blender jar. Dice or slice the rest, and add to the salad bowls.
5. Make the dressing: Place all of the ingredients in a small blender jar, and whizzz!
6. Add the shrimp to the salad bowls, and drizzle with the dressing. Serve immediately, and enjoy!

2.08.2011

incredible olive oil french fries

olive oil French fries, yes, oven-baked
These are truly incredible.  My seven year old niece was skeptical that I was making fries.  "In the oven?", she asked.  Later she said, "They smell like real fries."  And at dinner, she said they tasted like real fries too.  Then, I knew they were truly good.

Don't worry either, they don't have a distinctly olive oil flavour.  They just taste like utterly fantastic French fries.  Yes, you would pay money for them, and be quite happy about it.  And probably even happier if you watch your pennies, because a sack of potatoes is infinitely cheaper than the cost of soda.

I wish I could tell you that this recipe will make a big greasy mess, and that you have to find a particular kind of oil, and a particular kind of pot.  But you don't.  In fact, not even close.  Unfortunately, you do need a convection oven.  Okay, so there is a hitch.  Honestly though, until now, I have rarely used the convection features on my oven.  There just aren't many baked goods that I prefer burnt on the outside, but raw in the middle.  For fries though, convection is truly perfect.

olive oil French fries, yes, oven-baked
There are two convection features on my oven, and I have found that the one which circulates the most air takes significantly less time, so not all convection is necessarily created equal.  Essentially, potatoes contain a tonne of moisture which the convection helps to dry out, and crisp up the outside of the potato all at the same time.

What? No time to go to the spa?  Prepare for a steamy potato-like facial upon opening the oven door.  Watch your eyes.

Olive Oil French Fries

Ingredients:
Yukon gold potatoes - enough to not quite fill a cookie sheet
extra virgin olive oil - a couple tablespoons
sea salt

1.  Pre-heat the oven on convection to 425 degrees Fahrenheit.  Cover a cookie sheet in parchment paper, or a silpat (just means a bit of an easier clean up;  I like to spend my time cooking, not cleaning).
2.  Wash, dry, and slice the potatoes (preferably with the peel still on), to a thickness you desire.  I liked about a centimeter thick, give or take.
3.  Place the fries to-be, on the cookie sheet, and spread evenly.  Drizzle with a couple tablespoons of olive oil.  If you're skeptical, you can always add more later.
4.  Place the cookie sheet in the oven, and leave it alone for at least 20 minutes.  Then, check it and carefully turn the fries.  This will help to spread the oil even more.
5.  Keep the fries in the oven until the top begins to look golden brown, then give them another turn.  Put them back in, and continue to bake until they are as crisp and as golden as you like.  This might be 45 minutes - 1 hour.  That's it.
6.  Oh right, sprinkle with salt immediately upon removing from the oven.

12.22.2010

homemade dark hot chocolate mix & marshmallows too

melting
Homemade. Yes, the marshmallows too!

I thought it would make cute gifts I could give friends and family for the holidays. The best part is that the marshmallows are good for a few weeks, at least. So, if I missed seeing someone on a particular day, it wasn't like their foodie gift would become any less indulgent, as it might with say, cookies or fudge.

I put them in these cute little cellophane bags, and tied them with a little green bow.
gift

I like that the ribbon is green, so it's festive, but not too overdone.
wrapping

I found these sweet gift tags, and scribbled the cooking instructions on the back.
tag you're it

I did say cooking instructions, because I added cornstarch to the mix to make it a little thicker, and in my mind just that much richer. It does need a bit of whisking, or forking, if you will, and a tad of time to simmer. The cornstarch also helps to create the illusion of dairy, so you can use water or other non-dairy beverage to avoid dairy altogether.
whisking hot chocolate

I have to admit though, that I did just happen (an accident of sorts) to consume vast amounts of hot chocolate and marshmallows, just to be sure that I had the mix just right. It was tough, but it appears, I am yet unscathed!
marshmallow goo

So far, that is... These homemade marshmallows are incredible. Next time, I will scrape in the seeds of a vanilla bean.  Crushed pink peppercorns would also be fun with all their little pink bits peeking out.

I mean really.
homemade marshmallow

I forgot to mention that the hot chocolate mix has grated dark Callebaut chocolate. It's just so wrong that it's good. Leave a cup of this out for Santa, and he'll surely never leave.
hot cocoa and marshmallows

Homemade Hot Chocolate Mix

1 cup Callebaut Dark Chocolate Chunks
1 cup cocoa
1 cup granulated sugar
1/3 cup cornstarch

For the mix:
1. Place the chocolate chunks in a food processor, and pulverize until nearly a powder. I suggest wearing ear plugs!
2. Combine the ingredients together in a large bowl, and stir until well combined

For a serving:
1. Warm one cup of whole milk slightly.
2. Add 1/4 cup of the hot chocolate mix, and whisk.
3. Continue to heat until the milk simmers, and the mixture has thickened slightly. It should resemble the consistency of heavy cream, but not quite so far as a pudding or yogurt. Add marshmallows, and enjoy!

Homemade Marshmallows

3 packets of Knorr unflavoured gelatin, or approximately 2 1/2 tablespoons of unflavoured gelatin
1 1/2 cups granulated sugar
1 cup corn syrup (light or golden)
1/4 tsp kosher salt
1 tsp best quality vanilla, or the inside of a vanilla bean
plenty of icing sugar (confectioners' sugar)
candy thermometer
pastry brush

1. Combine the gelatin and a 1/2 cup of cool water in a mixer with a whisk attachment. Allow to rest for a half hour, or as long as it takes to make the candy syrup below.
2. In medium-size saucepan, combine the sugar, corn syrup, salt, and a half cup of water. Heat to medium, and stir only until the sugar has dissolved. Stop stirring.
3. Fill a small bowl with water, and use it and the pastry brush to dissolve any remaining sugar crystals that are clinging to the sides of the pan. Be semi-generous with the water.
4. Begin to monitor the temperature with a candy thermometer. Be careful! Bring the mixture to 244 degrees Fahrenheit, and then remove from heat.
5. Being careful, pour the syrup into the mixer with the whisk attachment. Starting slowly, whisk until the total amount has tripled in volume, approximately 10 minutes in length.
6. While the mixture is whisking, place nearly copious amounts (a little less than a 1/4 centimeter) of icing sugar in the bottom, and slightly up the sides of a 9 x 9 baking pan (metal or glass).
7. Spread the whipped marshmallow into the pan, and allow to cool and dry for at least twelve hours. No need to cover.
8. Using a hot knife, loosen the marshmallow from the sides of the pan. Turn the gigantic marshmallow out onto a cutting board. Have more icing sugar at the ready. Continue to rinse and heat and dry the knife. Slice the marshmallows into desired sizes, and lightly dust with more icing sugar to prevent the creation of another giant marshmallow.
9. Place the marshmallows in an airtight container, and therefore, ready to be enjoyed!

11.19.2010

mache salad with feta cheese, roasted kabocha squash, toasted walnuts, in a walnut-citrus vinaigrette

mache, feta, kabocha squash salad with toasted walnuts and a walnut vinaigrette

Generally, I don't like to fuss over salads too much. I just like to get good stuff in a bowl, add some olive oil, a sprinkle of fleur de sel, and away I go.

But I've been into walnuts and walnut oil lately. I figured that some roasted squash would be good. And heck, yea, it was. It is especially good with some mache, which is becoming increasingly popular green and even easier to find. But any dark green will work in a pinch.

I won't give you specific amounts because, heaven forbid you might add a teaspoon less feta cheese, or an extra walnut or two. For shame.... I mean seriously, it's a salad. And it's just not worth getting that serious about specifics for everything, oh, except one very important thing - just make darn sure it tastes good.

mache, feta, roasted kabocha squash with toasted walnuts and a walnut vinaigrette

Roasted squash:

1 kabocha or butternut squash
salt
pepper
extra virgin olive oil

Preheat the oven to 400 degrees Fahrenheit. Slice the squash into 1-inch strips, and remove the seeds. Place the squash strips on a cookie sheet lined with parchment paper. Drizzle with olive oil, and sprinkle with salt and pepper. Roast in the oven for 20-25 minutes, until the squash is fork tender. Let cool, and then remove the skin with a knife. Cut the squash into 1-2 inch chunks.

Salad:

mache greens
roasted kabocha squash
feta cheese
walnuts
honey
fresh lemons, 1 lemon for every 2 servings
walnut oil, or
salt
pepper

Roughly chop a small handful of walnuts per serving. Toast walnuts briefly on the stove, and set them aside to cool. Squeeze the lemon juice into a glass measuring cup. Add twice the amount of walnut oil, and couple teaspoons of honey per serving. Whisk. In each serving bowl, add some mache, roasted squash, toasted walnuts, and crumble some feta cheese. Spoon over some of the citrus-walnut vinaigrette, sprinkle with salt and pepper, and enjoy!

11.09.2010

crazy good beef short ribs with a puddle of polenta

You know how once in a while, you have something so good, so mouthwateringly delectable, so very scrumptious, that you really just want to jump right onto your plate?

Now, as much as I wanted to be covered in this puddle of polenta, while it might be quite good for the skin, isn't exactly quite as fantastic as devouring this silky polenta slathered with beef short ribs, cooked to tender oblivion.

And I hate to say it.

Don't tell.

But it IS easy.  And you'll be the marvel of all who even are fortunate enough to get a whiff.

Plus, this makes a lot of food, so you might not have to lift a finger for at least another meal or two.
beef short ribs in a puddle of polenta

A rich plate of meaty and cheesy goodness deserves a green salad.  This one had a lemon, olive oil, and garlic vinaigrette.  I topped it off with some walnuts, and some grated grana padano.  It was a tough decision, but I had to save a little bit from the cheesy polenta.


arugula, grana padano, walnuts

Now, onto the short ribs.

Like I said, they are easy. But... they do take awhile. The good thing is that you won't be slaving in the kitchen, just everyone will think that you did. Oh darn!

The hardest part is finding beef short ribs if you never have before. Never fear, you will find them. You can get them at most grocery stores.

YES, they look fatty. That is what makes them good. Actually, freaking great.

Again, don't worry, some of it will be scooped off. The rest will make you happy. And the rest is why you have the green salad.

Now, first you are going to make a simple tomato sauce. You can make it on the stove, sure. But it's easier if you virtually plop everything in the pot and cook it overnight in the oven. Less fussing.

Then, wrap a cookie sheet in aluminum foil. Place a rack on top. Put the short ribs on top of that. Like I said, it's easy right? Turn on the broiler in the oven. Brown the short ribs.

Finally, put them in the pot with the tomato sauce, and cook until the bones fall out of the short ribs, and you are sure that if anyone toothless dined with you, that even they wouldn't have to chew.

Savour.

Beef Short Ribs with Polenta

1 onion
2-28 oz cans of whole plum tomatoes (or approximately 8 cups)
extra virgin olive oil
2 tsp ground fennel seeds
2 tsp dried oregano
large pinch chili flakes
salt
pepper
1 clove of garlic
3-4 pounds of beef short ribs (approximately 8 short ribs, more or less)

1. Pre-heat the oven to 200 degrees F.
2. In a deep-sided sauté pan, or dutch oven, heat a few tablespoons of olive oil on medium-high heat. Chop the onion, and brown it in the oil, 5-7 minutes.
3. Remove the pan from heat, and add the tomatoes with their juices, fennel seeds, oregano, chili flakes, and a teaspoon of salt, and a few twists of pepper. Place in the oven. Let it go overnight, or all day. As you prefer.
4. To make the tomato sauce, add in a peeled clove of garlic (or two), and purée with either a hand blender or in the blender, when cool. Taste, and adjust for seasonings. It is best if it is quite spicy from the chili flakes, do not fear! The flavour will cook into the short ribs, and become less pungent.
5. Pre-heat the broiler to high heat, and arrange the oven rack closer to the top of the oven, probably the second rung from the top. To brown the short ribs, cover a cookie sheet with aluminum foil to catch the drippings. Place a rack (perhaps a cookie cooling rack) on the top, and arrange the short ribs on it. Sprinkle with salt. Place 4-5 inches underneath the broiler.
6. Allow the ribs to brown, and become crispy before using tongs to flip the ribs to an alternate side. Approximately 10-12 minutes.
7. Add the short ribs to the tomato sauce, and cover with a lid. Simmer on the stove until the meat easily falls away from the bones, approximately 3-4 hours, you can't cook this too long. Do keep an eye on it, and stir occasionally. Keep the heat low enough that the tomato sauce will not burn. Skim and remove some of the oil when as it separates and floats to the top. When the meat is tender, remove the bones, and tear the meat into smaller pieces. Taste, and check for seasoning.

Cheesy Puddle of Polenta

6 cups water
2 teaspoons of salt
1 3/4 cups cornmeal
2 tablespoons of butter
1/2 cup grated grana padano cheese
1/2 cup grated fontina

1. First, if your cornmeal is of a very fine grind, then these amounts will work, otherwise, if you cornmeal is stone ground with a larger kernel, then use 5 cups of water. Alternatively, read the package directions.
2. Bring the water to a boil in a medium-size saucier, or stockpot. Add the salt. Lower the temperature to medium-low. Add the polenta, and whisk, whisk, whisk. Continue to do so until the mixture is quite thick.
3. Remove from heat, and stir in the butter, then the cheeses. Serve immediately.

9.15.2010

smoky slow-cooker black bean soup

smoky black bean soup
I need a delicious, but comforting and healthful dinner.  But, sometimes it can't require a lot of hands-on time.  I literally rushed through this one, and it took less than 20 minutes of my time, granted there was some waiting.  The results?  Very worth it.

Are the amounts of ingredients set in stone?  No.  It's not a fussy recipe.  This is not a pastry, or a cake.  It's a soup.  A little less carrot, or a little less celery isn't going to create a train wreck.  Just trust me, and make a big ol' pot of soup.  You'll have a fabulous dinner, and a good bunch of leftovers for some stellar lunches.  Go for it!

Slow-Cooker Black Bean Soup
Dried black beans (enough to fill approximately 2 inches of your slow cooker)
2 medium onions
2 large carrots
2 sticks of celery
extra virgin olive oil
water, or chicken broth or both
kosher salt
1-2 tsp ground cumin

For garnish:
6 slices bacon
1/2 avocado per person
1 large bunch cilantro
yogurt, sour cream, or creme fraiche

1.  Thoroughly rinse the black beans in a colander.  Place in the slow cooker, and cover with 2 inches of water.
2.  Rinse the carrots, celery, and onion in the colander.  Roughly chop.  Be quick, it doesn't matter, it's going to be mostly puréed later on.
3.  Heat 1-2 tbsp extra virgin olive oil in a non-stick skillet on medium-high heat.  Add the vegetables, and keep the heat fairly high, just to give it some good golden colour.  Nothing needs to be cooked evenly, it will all soften in the slow cooker.  Just go quick, approximately 2-3 minutes.
4.  Add the vegetables to the slow cooker, add a teaspoon of cumin, and a few teaspoons of kosher salt (I added 1 tablespoon, but this might be different depending on the size of your slow cooker).
5.  Turn the slow cooker on the lowest setting, and leave for 4-5 hours.  Once the beans and vegetables are tender, the soup is ready.
6.  Slice and sauté the bacon until crispy.
7.  Remove a few cups of beans from the slow cooker, and set aside.  Using a hand-blender, quickly blend the soup, being careful not to overdo it, or there is a tendency for the beans to become like glue.
8.  Add the beans that were set aside, back to the slow-cooker.  Stir, and taste for seasoning.  Add more cumin, or salt, as desired.
19.  Chop the cilantro, and slice the avocado.  Ladle the soup into serving bowls, and garnish with avocado, cilantro, yogurt, and bacon.  Serve immediately.
10.  Add the remaining bacon, and chopped cilantro to the leftovers for another dinner or several lunches.

9.04.2010

butter, is never optional

Today for lunch, was Mark Bittman's Spiced Red Lentil Dal.  I can't get enough of this stuff.  It is filling.  It is delicious.  Healthy.  And, before I start to sound like I'm selling an As Seen On TV, martini, bikini item, just go ahead and try it.  I like to make it in large batches, and freeze it in individual servings for lunch.  However, I do have to disagree with Mark Bittman; butter is never, ever optional.
spiced red lentil dal

8.08.2010

smoky orange shrimp to share

smoky orange shrimp I love to have friends and family over for dinner. Love it. Usually there is at least some semblance of planning. But sometimes things have to be done on the fly, and improvised a bit. Like when I return home from grocery shopping, and realize that there really is no appetizer, and while being at the beck and call of a new baby, the tummies of others can get put on the back burner. Hence the invention of a shrimp dish that is made to be shared, just so no one is starving by the time the rest of the meal finally arrives. Just plate up the shrimp and hand out the forks. Don't wander too far from the plate because these won't last long. Smoky Orange Shrimp to Share 1 pound peeled and deveined raw shrimp 2 tsp extra virgin olive oil 3 cloves minced garlic 1/2 tsp minced ginger 1/2 tsp smoked paprika 2 tbsp of frozen orange juice concentrate 1 tsp freshly chopped chives 1. In a preheated nonstick skillet, add the olive oil garlic and ginger. Heat on medium-high heat, just until fragrant, and the garlic is lightly brown. 2. Add the shrimp and paprika to the pan. Lower the heat to medium-low, and cook the shrimp for another 30 seconds, stirring nearly continuously to ensure the shrimp are evenly cooked. 3. Add the orange juice concentrate and continue to stir until the shrimp are cooked. 4. Quickly remove the shrimp to the serving plate. Leaving behind some of the sauce. 5. Reduce the sauce until there is just one tablespoon of liquid. Then spoon the sauce over the shrimp, and sprinkle with the chives. Serve immediately, and enjoy!

8.07.2010

sumptous moose stew

moose stew Perhaps moose stew, or stew in general, doesn't sound particularly sumptuous or something that can be remotely sexy. Maybe moose is more likely to bring up memories of some cartoon-like character or an animal that is apt to wreck vehicles. Surely, moose is a little rare; it's not like you can get it in the grocery store. Fortunately for us, a good friend gave us several cuts of moose, and this roast turned into stew has been the favorite dish so far. The roast was an odd candidate for a stew, as it was some of the leanest meat I have ever seen in my life, but I also wanted to use a few of the turnips received from the CSA bag a few weeks back. Certainly, it won't be possible to recreate the dish with moose all the time, but I will definitely try this again with beef as soon as the weather is cold. You are likely thinking I'm crazy for making stew in the middle of summer, but it did work out that I made it on a very cold and rainy day. Thanks Calgary... Find yourself a cold and rainy day, and enjoy this dish as much as I did! pot o' moose stew Moose Stew Serves 8-10 1, 2-3 pound roast of moose, or beef cut into 1-inch cubes 3 medium onions, thinly sliced extra virgin olive oil half bottle of full-bodied red wine salt small can of tomato paste 3-4 cups of plum tomatoes in their juices 4 cups chicken stock, preferably homemade 1 tbsp of finely chopped fresh chopped rosemary 1 tsp herbes de provence 1 tsp of ground ginger sprinkle of turmeric 1/4 tsp dried oregano 1.5 inch cubes of peeled sweet potatoes, about 6 cups 1.5 inch cubes of unpeeled turnips, about 2 cups 4-6 carrots, halved, and 2-3 inches in length 1. Pre-heat a deep-sided saute pan, on medium-high heat with 2-3 tablespoons of olive oil. Brown the meat in batches, adding a touch of salt here and there, and be sure to keep the heat until meat is browned and not to overcrowd the pan to prevent steaming the meat without caramelization. Remove the meat from the pan, and set aside. 2. Add another 1-2 tablespoons of olive oil, and add the sliced onions. Allow the onions to caramelize, and then add the wine. Scrape any lovely brown bits on the bottom of the pan into the mix. 3. When the wine has evaporated, add the meat back into the mix, as well as the tomato paste, plum tomatoes, chicken stock, and the herbs. Allow to simmer on medium-high heat on the stove until the liquid has cooked down. Add a couple teaspoons of salt, I used coarse sea salt. 4. Pre-heat the oven to 275 degrees Fahrenheit. 5. Add the sweet potatoes, carrots, turnips to the pot. Cover with a lid, and place in the oven for at least 3 hours. Do not stir once the vegetables are tender, or the sweet potatoes will disintegrate. 6. Best served in bowls with a bottle of wine, and a fresh green salad or gently steamed green beans. Enjoy!

7.31.2010

figs, figs, figs

figs, mascarpone, and balsamic I am currently working on typing in the dark with one hand, while the other hand cares for baby. It takes a good bit longer than normal, but in the meantime, I love the cuddles. So I guess I'm a good chunk busier, as nearly everything gets interrupted in the process. I am convinced that many women lose their pregnancy weight because babe conveniently wants to eat at the exact same time. And short of being spoon-fed by someone else... getting to eat can easily become a production for Moms, or at least me, cooking aside. I don't know about you, but when I'm busy, I still want to eat and eat well at that. And who isn't busy baby or not? Food still has to be tasty, and not necessarily complicated. Dishes which exemplify the individual exuberance of an ingredient without being overwhelmed by other flavours. I like the simplicity of this recipe, but more importantly the ingredients involved. There isn't one ingredient which I couldn't tout endlessly as "the best thing ever", and happily chirp about their individual yumminess. I could pathetically wax poetic about figs alone for hours on end. Apologies already for figs, glorious figs Ripe figs are so succulent and juicy, but also have a deliciously delicate flavour that is effortlessly highlighted by something a little sweet. Mascarpone seems so very sinful, and calorie-wise it certainly packs a punch. But I'm still a sucker. Then the balsamic just adds a little tang to the party, and another hint of sweetness too. Do keep in mind that I am not using balsamic vinegar that I would on a salad, but essentially a reduced form of balsamic. It is becoming easier to find in gourmet shops, but I did happen to come back with it from La Perla Salumificio in Langhirano, Italy. Yes, I was a little dismayed to find the same thing after arriving at home... It isn't impossible to reduce from balsamic on the stove, although watch your nose hairs! Alternatively, an aged bottle of balsamic can also be used, at your pocketbook's peril of course. Honey is a classic pairing that is easy to find in the pantry in a pinch. figs, figs, figs Figs, Mascarpone, and Balsamic Crema Ingredients for one serving: 2 figs, sliced in quarters 1/4 cup mascarpone cheese 1 tbsp sugar, more or less drizzle of balsamic crema, reduced balsamuc, aged balsamic, or honey 1. Combine the sugar with the mascarpone using a fork. 2. Using two spoons, create a scoop of mascarpone, but it doesn't need to be too fussy. Place on the serving plate with the sliced figs. Drizzle with something sweet, and enjoy!

8.08.2009

world's richest chocolate-hazelnut ice cream

This is so unbelievably rich, you will hardly believe it. I prefer to make ice cream from absolute scratch for my own peace of mind. But, in a pinch, this will do much more than make do. It's absolutely sinful. 1 can of condensed milk 2 cups of whipping cream 1 cup of nutella 1. Place an empty container, that will later hold the ice cream, into the freezer to cool. 2. Combine the ingredients in the blender. Decide who will lick the nutella spoon. 3. Pour the mixture into the ice cream dasher, and freeze according to manufacturer's directions. 4. Freeze for at least another 1-2 hours, depending upon freezer temperature. 5. Serve, and do at least try to share.

guacamole & steak tacos

cilantro & onion & steak I know it doesn't look like much. But I think there are at least a few dozen posts that were never born because this past spring I have been head over heels for this dinner. So, for my birthday I had to have these tacos, with the real deal tortillas. Plus, it's all gluten-free, which makes it perfect to share with friends. The hardest part of the whole thing is just to make sure to have all of the ingredients as fresh as possible, and also to have ripe avocado's on hand. I also recommend having a bag of tortilla chips handy to ward off starvation, and to enjoy the guacamole, and cilantro-onion salsa, just be cautioned that you might not make it to the tacos! It isn't exactly refined in appearance, but I dare say, that my mouth waters when I think of tasting this steak taco with guacamole, and chipotle hot sauce chunky guacamole Guacamole for Four 3 ripe avocadoes 1/2 cup finely chopped onion (the stronger the better) 1/2 cup cherry tomatoes, quartered 1/4 cup finely chopped cilantro juice of at least 2 limes salt, to taste 1. Add the onion, tomatoes, cilantro, and lime juice to a medium size bowl 2. Using a very sharp knife, carefully cut the skin, down to the pit, all around the avocado. Separate the two halves with your hands, by gently wiggling the two pieces back and forth. Remove the pit with the knife. 3. Using a paring knife, slice the flesh into long strips, and then again across the flesh, to create little cubes. Scoop out the flesh with a grapefruit spoon. 4. Add the avocado to the bowl and mash slightly with a fork. I prefer it a little bit chunky, but feel free to mash to your own liking. 5. Add the salt, and taste. guacamole & steak Steak Tacos Tacos can be made with any protein, or even just vegetables. Of all things, we have a tonne of beef tenderloin, which for us, is too lean for anything other than tacos. Any cut of steak will do, the trick is to freeze it for a bit before slicing, so it's easier to shred with the knife. It can also be marinated in any multitude of things, including orange juice, lime juice, cumin, coriander, cayenne, or anything chipotle. Fry it up in a cast-iron skillet or saute pan. I never eat tacos without this healthful, but addicting salsa. An absolute must. Corn Tortillas How-To Corn tortillas seem a little tricky at first. They seem incredibly dry and even a bit brittle until warmed up, and then they revive themselves. Do not add water or any oil. Using a cast-iron skillet pre-heated to medium, there are two ways to heat the tortillas: It is easy to prepare one tortilla at a time, but it is best to consume immediately. Place the tortilla on the pre-heated skillet, and allow it to subtly brown. If there are black marks, that is taking it a bit too far. You can try to keep it warm by wrapping it in a tea towel, but if you can, it is better to prepare a stack at a time. Hopefully, you have the patience to read this, digest it, and re-read it. To prepare a stack of tortillas, place the stack on the hot skillet. Allow the bottom tortilla to brown, but again, not to become black. Then, flip the whole stack over. Now the top tortilla will be on the bottom browning, and the formerly bottom tortilla, which is browned on one side, will be on the top. Using a metal spatula, insert it into the middle of the stack and lift the upper half off the pile. Flip the upper half of the pile face down, onto the remaining stack, so that the cooked half is facing down. This will keep it the cooked tortillas from drying out, and turning into crackers. Soon, the tortilla on the bottom of the stack will be browned. Flip the whole stack again, so the cooked side is now on the top. Find the other cooked one in the middle, and flip the upper half of the stack so that the two cooked tortillas are next to each other, but both facing down. Repeat the process, and then repeat again for the other side of each tortilla. Immediately after removing the tortillas from the skillet, place the stack of tortillas into a tea towel. Keep the tortillas covered. Only heat enough for the first few tortillas for each person, and later heat some more, as necessary. If the tortillas sit too long, they become brittle and virtually useless as a taco. These tacos are a cinch, and ridiculously delicious to eat, once you get the process down. Don't be intimidated, just go for it!

6.26.2009

summer at last

platter skewered Well almost. Technically, there are another two school days left, for teachers that is. But I think I'm pretty much checked out. Part of me still wants to obsess about next year, but I am trying not to, since there is a ridiculous amount of time to do that; like, say, all of next year. Food wise, I think I have just the hook to get me into the fun in the sun. Shrimp kabobs, and a black bean salad. To delve deeply into the spirit of summer, I am skeptical of such flirtations occurring without the grill. Certainly, there are the requisite items for the grill, tender steaks, juicy burgers, and sweet and crunchy corn. But it is lovely to enjoy something a little bit different than the usual suspects, which honestly, do seem to happen all year, each and every time we find that the wind has died down enough to get the grill going. With each new season, it is nice to enjoy a bite or two that truly drive home the point of the new season. It's summer, and time to make the most of it. Sometimes, I find this hard to actually do. Mostly because I try to keep summer going long into the fall, or at least hoping, and keep reliving the dishes that made summer summer. Last year, it was anything that needed to be chopped or diced, and would keep my little kitchen from overheating, when it has already become a sweat-box. So, I think I've finally gotten into the spirit of this particular summer. I should have rubbed a buddha belly, or found some kinda genie's lamp a long time ago, but I think I've finally found a couple of dishes I will likely want to eat over and over again. skewered Grilled shrimp is fabulously summery. Light, but can almost trick you into thinking about the beach. I love cherry tomatoes on the grill too. Since they are so sweet to begin with, they only seem to get better when their sugars get heated through. But what is summer without a salad? There are so many salads to enjoy, but it can also be easy to get stuck in a salad rut. Black beans with an orange pepper, sweet white onion, cilantro, lime juice and olive oil, is not only healthful, but extremely addicting. I wish you luck if you think there will be leftovers. Black bean deliciousness Summer Shrimp Kabobs *Peeled raw shrimp (somewhat "large", with or without the tail on) Cherry tomatoes Button mushrooms, halved Extra virgin olive oil Juice of 1 lime 1 tsp ancho chili powder Kosher salt Skewers 1. Pre-heat the BBQ, to "medium". 2. In a medium sized bowl, combine the lime juice and the ancho chili powder. Allow the shrimp to marinate in the misture, at least 5 minutes, but not longer than 20 minutes (unless you want ceviche). 2. Once the shrimp have marinated, start placing mushrooms, cherry tomatoes, and shrimp on skewers. Drizzle the skewers with extra virgin olive oil, and sprinkling with salt as you go. Place the skewers on a plate to go to the BBQ. If you prefer, sprinkle a bit more ancho chili powder just in case. 3. BBQ until the shrimp are pink, and the tomatoes are just seared through. 4. Drizzle with more extra virgin olive oil, or alternatively serve with a hot sauce, or a chipotle sauce (also very good!). *I am not being specific about amounts, as you can feel free to be creative with the amounts of tomatoes, or shrimp as you see fit. Some of you might want only shrimp and tomatoes, others might not want tomatoes at all. Just go for it, there is no right or wrong here. insalata Summer Black Bean Salad I love black beans, and eat them often. I hope you will enjoy this salad as much as I do! 1 - 19oz can of black beans, rinsed and drained 1 orange or yellow bell pepper, diced 1 medium white onion, diced 1 bunch cilantro, finely chopped 1 avocado, sliced before serving (optional) Dressing - 4 tbsp, extra virgin olive oil Juice of 1 lime 1 tsp Hungarian paprika 1 tsp ancho chili powder Salt, to taste 1. In a medium-sized bowl, combine the beans, bell pepper, onion, and cilantro. In a smaller bowl, whisk together the olive oil, lime, paprika, and chili powder. 2. Pour the dressing over top of the beans and vegetables. Taste for salt, and adjust as necessary. 3. Once the salad is placed in serving bowls, then place slices of avocado over the top, or dice it. Just don't add it too soon, in order to prevent discolouration. Vacation Italia starts on Wednesday!

4.21.2009

skinny dipping

How come beans aren't more sexy? They really should be much more sought after. Chased and cherished, I say. Lets face it, there is a lot to like. Beans are cheap and plentiful. They are just the thing I imagine in the story Stone Soup. little bite Stone Soup is one of those Grimm Fairy Tale stories, my Baba used to read us as kids. One of those stories with a hefty, do good moral to it. I think it starts off with a man, who had nothing to put in his soup except for a stone. Soon, a young lady comes along and asks what the man is making. He says, "Stone Soup, but it is missing some flavour." The young lady thinks this is odd, because of course the soup will have no flavour. However, she has an onion for his soup, so she adds it in. As you can probably already figure out, soon the entire town comes along and adds a potato, or a carrot, or something to the soup...and it becomes a real soup...not just stones and water. The point is, everyone chipped in a little bit and then there was a real meal for a hungry man who otherwise had nothing. Luckily, Baba must have read this to us to make us grateful for what we have, and had better appreciate her cooking (and no wasting, every scrap must be eaten!). But surely, a few beans must have been added to the Stone Soup. Beans have an extraordinary amount of flavour, and even start off a little bit stone-like. I mean, they sure are filling, and certainly pack a whollop of fibre. Perhaps that is what wrecks any seductive qualities the poor beans would otherwise have been missing out on....poor beans. Of course, this can cleverly be used to your advantage if you work in close quarters with people you would rather keep at bay...then beans are your very-bestest-friend. Want your seat permanently reserved? Then add garlic. Raw garlic, and lots of it. At its simplest components, that is this recipe in a nutshell. It's like making hummus, or any other white bean/white kidney bean/cannellini bean dip you've probably seen. This is so easy it's almost criminal to have actually photographed this and then to give you the recipe. Truthfully, I like to mash things up in the food processor, and taste to see if everything is okay. These kind of things are fun. There's not too much to screw up, which is always nice if there is any anxiety present. Except it would be even better, if it didn't require moving the hefty food processor to the kitchen every time I wanted to use it. But it is kind of like hiking the alps, and will keep me in shape for the years to come, yes? Well who knows, but I love beans. And I eat lots of them. Hopefully, that will help my shape too. I've changed my mind. Start in reverse. Yes, you still need the food processor, but start a little mini-chopper processor if you have it. Toss in a bag or box of spinach (say eight cups worth), then continue with garlic, extra virgin olive oil, and parmigiano. Have you have a few nuts add those in too. Make a pesto. Whiz away. Then take the larger, clunker food processor, and add a couple cans of cannellini beans (rinsed bien sur!), more garlic, more extra virgin olive oil, and some salt. Some lemon is nice. Do taste it, and adjust the seasoning; you might like more lemon or more salt. Pucker up. Don't worry so much, you're almost done, and then you can finish cleaning up. You can find containers to put the pesto in, and the bean dip to store in the fridge if you want. It will be top-notch for a good 3 to 4 days....thank the garlic. The finished product should be a bit of a layered effort, with bean dip on the bottom, a good wack of pesto over that, and then a nice sprinkling of feta to complete the look. Serve with voluptuous bowls overflowing with the best seasonal vegetables. skinny dipping White Bean Dip with Spinach Pesto and Feta Serving size (lots!): Great for a party, or halve the recipe. Pesto (a simple one for the dip): 8 cups spinach 1/2 cup - 3/4 cup extra virgin olive oil 2 cloves garlic 1 tbsp parmigiano-reggiano a small handful of walnuts, pinenuts or almonds White Bean Dip: 2-19 oz cans of cannellini beans, rinsed and drained 3 cloves of garlic 2/3 cup extra virgin olive oil 1 tsp salt juice of a lemon Feta cheese, for sprinkling 1. Combine the ingredients for the pesto in the the food processor/mini-chopper, until all the spinach fits, and the ingredients are blended until fairly small. Be careful to ensure there are no large chunks of garlic or nuts leftover. 2. Chop the 3 cloves of garlic into pieces. Add them to another food processor, or after cleaning the same food processor. Combine the remaining ingredients for the bean dip. Blend until the beans are smooth in texture, but be careful that it doesn't result in a glue-like mixture, which can taste almost starchy. 3. To serve, place the bean dip in the bottom or a medium-sized bowl, or deep plate. Spoon half of the pesto on top, and spread it out a bit. Mix it in a little if you prefer. Sprinkle crumbled feta cheese over the top. Serve with fresh seasonal vegetables for dipping.

3.22.2009

roast lamb shank, spring salad, and dop mozzarella

Spring Salad Finally some vegetables! I don't know what has been going on, but Jeff and I have hardly been eating any vegetables at all. And we love them, but they have just been terrible in the shops, and essentially, a bit off-putting. But finally, dinner tonight had a salad. And thank goodness, a fantastic salad it was! It was simple, and just ended up to be what was in the house (always the best kinds of salads, are the impromptu ones). It did prove that I am absolutely addicted to avocados, because I admit that I craved a little avocado in each bite of the salad. Each salad had: -organic spring greens -organic broccoli sprouts - and someone tell me why I don't buy these more often!?? -1/2 an avocado -1/2 a navel orange -sliced red onion -lemon juice, and extra-virgin olive oil -a little salt We also had a yummy treat: mozzerella dop Some Chianti Ruffina, with some d.o.p mozzarella from Campania (sorry, not local but SO good!), roma tomatoes, with extra virgin olive oil. I could eat this creamy goodness everyday. Jeff's masterpiece: roast lamb shank Roast lamb shank with rosemary and garlic, and it was delicately falling off the bone. I realize that it looks a little "caveman-like", but there really isn't as much meat as there appears to be. You really should know that Jeff is the "expert" protein cooker in our house. This is a spin on the rack of lamb recipe he made for the first time he had me over for dinner. It was good then, and here is the evolution to the shanks. The lamb is really quite easy to make, although it does take 4+ hours in the oven! Roast Lamb Shank with Rosemary and Garlic (serves 2) 2 lamb shanks (2 1/2 lbs total weight) 3 tbsp finely chopped fresh rosemary 6 cloves of garlic, split into quarters 1 tbsp coarse sea salt extra-virgin olive oil 1. Pre-heat the oven to 500 degrees Fahrenheit. 2. Take the three tablespoons of rosemary, the sea salt, and 4 tbsp of olive oil, and combine to a paste. Spread and massage the paste all over the lamb shanks. 3. In a deep-saute pan, heat 1/4 cup extra virgin olive oil on medium. Add the quartered garlic, and reduce the heat. The recipe works best if the garlic is never browned, as it prevents it from burning. Allow the garlic to gently simmer at least 5 minutes, but if it appears it is getting too hot - add the lamb. This will cool the garlic and the oil. 4. Brown the lamb on medium-low heat, approximately 4 minutes per side. This is not a deep caramelization, and do continue to be diligent of the heat - don't let the garlic burn! 5. Cover the saute pan, and place inside the pre-heated oven. Immediately reduce the heat to 225 degrees Fahrenheit. The toughest part now is to be patient, while the fragrant aromas of rosemary and garlic call out to you. You must wait until the meat is nearly falling off the bone. Trust me, it's worth the wait! Tomorrow, I will tell you all about a very special tiramisu recipe! Obviously, it needs to rest overnight... so I can't tell what it tastes like yet, because I have no idea at all....

1.11.2009

jewel tones

Colourful Quinoa As teens, my friend Christine and I meticulously researched our way through every issue of Vogue Magazine. It was somewhat like an archeological expedition, and each one required its own special set of preparations. The most important ritual was to create a gooey chocolate treat. There was our rendition of rice krispie squares, more goo than crisp, or gooey caramel brownies, with more caramel than brownie. Neither of these snacks ultimately made any sense, when you consider that it was nearly impossible to turn the pages of the magazine, but we would giddily hide ourselves away, and virtually study the latest issue like a bible of sorts. In one such issue, I fell head over heels for the works of the Dutch painter Vermeer. You might have seen the painting the Girl with the Pearl Earring, which also sparked a book and a film. Most of Vogues' reproductions of his works not only featured musicians, but also recreated the most impressive palate of colours. The paintings were quite dark, but had such vivid hues with jeweled tones, to command the eye to beauty. Being a quirky girl, without posters of boy band members or horses, I cut out the Vermeer paintings, framed them and hung them up. I am not going to liken this little dish to the work of the great Dutch artist Vermeer. However, after continually staring at this photo and trying to determine what to tell you about it, all I can think of are the colours. Richly-hued tones peeking through something dark, and somewhat mysterious. And that does remind me of his vivid use of colour and light. So that's how I think of this dish with black quinoa, pomegranate, butternut squash, toasted almonds, and sage. Oh, and some maple syrup or agave nectar to sweeten things up. It's the contrast between the rich colours, and textures which create something pleasing to all the senses. Black Quinoa with Jewelry 1 cup black quinoa 2 medium butternut squash 1 pomegranate 1/4 cup sliced almonds 1/4 cup maple syrup or agave nectar 1 tbsp chopped fresh sage (optional) 1. Pre-heat the oven to 350 degrees fahrenheit. Slice the butternut squash in half, and place in a glass baking dish. Drizzle with olive oil, and lightly sprinkle with salt. Cover with tinfoil, and bake until fork tender. Let cool. 2. Cook the quinoa according to package directions; the little ring around the middle should be just starting to come loose, and each grain should still have some bite. Before removing it from the pot, gently stir in the maple syrup/agave nectar. 3. Separate the seeds from the pomegranate, and lightly toast the almonds. 4. When the butternut squash is cool, scoop out the seeds. Cut the squash into 1-inch chunks, and then remove the peel to reveal the chunks. Some more cutting may have to be done after removing the peel to ensure the pieces are of equal size. 5. In a large serving bowl, gently combine the quinoa, pomegranate seeds, butternut squash, toasted almonds, and the sage. Serve at room temperature and enjoy!

12.07.2008

rosiest hot chocolate

It's a bit of an optical illusion, what you see is not only what you get. It's a bit unexpected. Photobucket Finally, it is snowing outside today, and it's snowing furiously. Oh no, not just a couple flakes, but as if St. Nick himself was on the way this very night. It could be quite perfect, except that I fear I must stave off every attempt to become too festive. I am certain that I could go full force, with holiday spices, herbs, and dishes, especially baking, up until Santa's reindeer are prancing upon the roof, then I will be finished. And then how would I stay up all night, to greet the man in the red suit when he comes down the chimney? But I am in a wintery mood, and do need hot chocolate to keep warm. How else will I get through without something to subdue my anticipation? Rose hot chocolate. It's like the perfect drink for delicate palates. Nothing too heavy or overwhelmingly rich. It's lovely, and incredibly simple to make to warm up those rosy noses and cheeks. The hardest part might be sourcing rose water, which is often available at Middle Eastern specialty shops, but is often readily available in many chain grocery stores as well. I chopped 70% dark chocolate with a knife. It doesn't have to be perfect, just easily meltable. Photobucket Rosiest Hot Chocolate (serves 1-2) 1/2 cup whole milk 2 slightly heaping tablespoons chopped dark chocolate (70%) 1 tsp agave nectar 1 tsp rose water 1. In a small saucepan on medium-low heat, warm the milk until steaming, and little bubbles have formed around the perimeter. 2. Whisk in the chocolate, and combine until evenly melted. 3. Add in the agave nectar. 4. Remove from heat, and add the rose water. Serve immediately.

11.23.2008

chestnuts roasting.... over hot chocolate

Photobucket Chestnut hot chocolate is for the chestnut connoisseur. The chocolate is not too overpowering, as to prevent the flavour of the chestnuts from singing through. Orange blossom honey helps to round out the flavours, by adding a slightly floral element. This is a welcome addition to satiate my hot chocolate cravings. Chestnut Hot Chocolate (serves 1-2) 1 cup whole milk 10 unsweetened chestnuts, jarred 20 g 70% dark chocolate, chopped 1 tbsp orange blossom honey 1. In a blender, combine the milk and chestnuts until smooth. 2. Heat the milk and chestnut mixture in a small saucepan, on low heat, until bubbles begin to form around the edge. 3. Add the dark chocolate, and whisk until combined. 4. Mix in the honey, until well combined, and remove from heat. Serve immediately.
Related Posts with Thumbnails